Introduction to Apple Watch Bands
Every wrist has its unique size, just like every Apple Watch band has its style. Besides being functional, these bands are a great way to express your personality. Whether you prefer a sporty look, the grace of a Milanese loop, the sophistication of a leather strap, or the sleekness of a metal link bracelet, Apple has a band for everyone.
But here’s the catch: not every band fits perfectly right out of the box, especially the metal link bracelet. To achieve that ideal, comfortable fit, you might need to adjust it a bit. This guide will walk you through how to remove links from your Apple Watch band easily and accurately.
Getting your Apple Watch band to fit perfectly is simpler than you might think. Follow these steps to adjust the band and ensure it’s comfortable and stays secure on your wrist.
Step 1: Get Your Workspace Ready
Find a clean, flat surface with good lighting—like a stable table or desk. Cover the area with a soft cloth to protect your band and watch from scratches. Keep all your tools close by so you can work comfortably and safely.
Step 2: Check the Fit and Mark the Links
Wear your watch and see how many links need to be removed for a comfortable fit. Mark the links you plan to take out. Make sure to remove the same number of links from each side of the clasp to keep it balanced.
Step 3: Set Up the Watch’s Band
Place the band on the soft cloth to avoid scratches. Make sure that the arrows on the inside of the links are facing away from you—these indicate the direction in which to push the pins out.
Step 4: Push Out the Pins
Position your link removal tool over the pin you want to remove. Slowly turn the tool’s knob to push the pin out. If you don’t have a link removal tool, a pin pusher can work as well.
Step 5: Remove the Link
Once the pin is halfway out, gently pull it out completely using tweezers or your fingers. Do the same on the other side of the link. Detach the link and keep the pins safe in case you need to reattach them.
Step 6: Reassemble the Apple Watch Band
After removing the desired number of links, reconnect the band by aligning the holes and reinserting the pins. Push the pins back into place with the tool or by tapping lightly until they’re secure.
Step 7: Check the Fit Again
Wear the watch again to ensure the fit is just right. If it’s still not perfect, you may need to adjust by removing or adding more links. Repeat the steps until the fit is ideal.
Tools Required to Remove Links from an Apple Watch Band

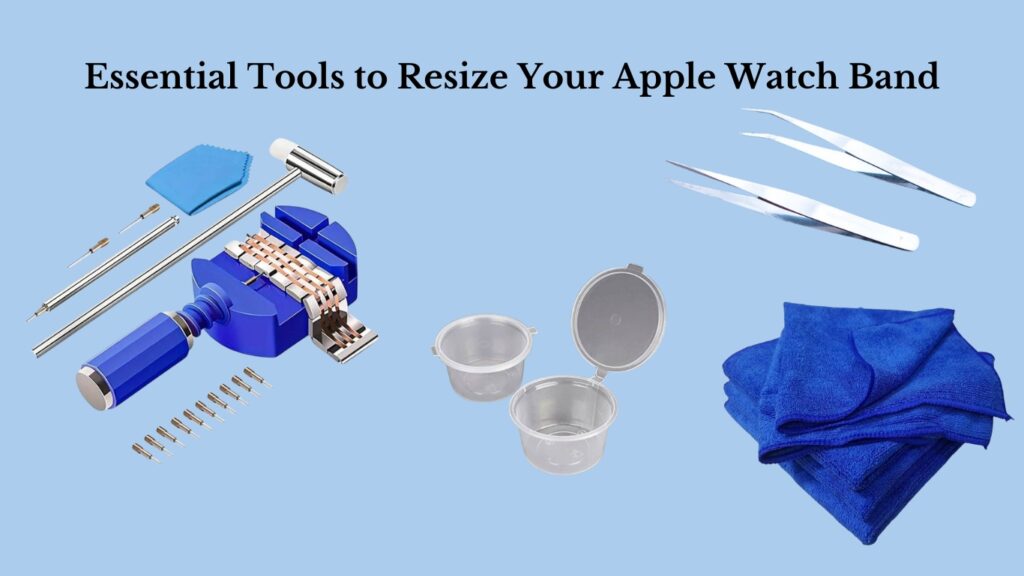
To adjust your Apple Watch band with links, you’ll require a few essential tools to make the process smooth and avoid damaging the band. Here’s what you’ll need:
Link Removal Tool or Pin Pusher:
This small device helps push out the pins that hold the links together.
Microfiber Cloth:
Protects the watch and band from scratches during the adjustment.
Tweezers:
Useful for handling tiny pins.
Small Container:
Keeps removed pins and links safe and organised.
You can find these tools in watch repair kits. It’s worth investing in a good link removal kit for a smooth resizing experience.
How to Successfully Remove Links from Apple Watch Band
To make sure you remove links from your Apple Watch band successfully, follow these simple tips:
Take Your Time:
Don’t rush. Moving too fast can cause mistakes or damage. Go slowly with each step.
Be Careful with Pins:
Pins are tiny and can easily get lost. Use tweezers to handle them gently.
Check the Fit Often:
After each link removal, try the band on to see how it fits. It’s easier to take out more links than to put them back.
Keep Parts Safe:
Store any removed links and pins in a safe place. You might need them if you want to adjust the band again later.
Avoid these Common Mistakes When Removing Apple Watch Band Links
When adjusting or changing your Apple Watch band, watch out for these common mistakes:
- Don’t use just any random tool; it can damage your band. Always use a proper link removal tool.
- Pushing too hard can bend or break the pins. Be gentle and steady.
- Work in a bright area and keep a small container handy for tiny parts like pins and links.
- Pins need to be aligned correctly. Misalignment can cause the band to fall apart.
- Never force pins out. If they’re stuck, adjust the tool or consult a professional to avoid damage.
- If you remove too many links at once, the band might be too tight. Remove them one at a time and check the fit often.
When to Turn to an Expert for Help?
If you’re unsure about adjusting your Apple Watch band or if the process seems too complicated, it’s wise to seek professional help. Professionals are the safest option. They have the right tools and expertise to handle link adjustments. A watch repair specialist can resize your band quickly and correctly, or you can visit your nearest Apple Store.
What Are Apple Watch Bands with Links?
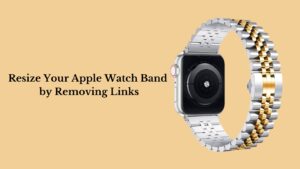
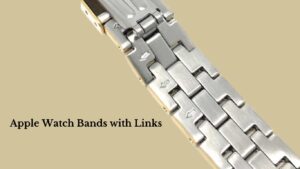
Apple Watch bands with links, like the Link Bracelet, offer a classic and sophisticated look, similar to traditional metal watch bands. Made from stainless steel, these bands consist of individual links that can be easily added or removed to adjust the size.
Unlike the one-size-fits-all Sport or Leather Bands, link bands let you customise the fit, ensuring both comfort and a secure grip on your wrist. This tailored adjustment not only improves comfort but also keeps your watch in place for accurate sensor readings and easy interaction with the screen.
Why Does a Well-Fitting Apple Watch Band Matters?
A well-fitting Apple Watch band is essential for more than just appearance. It affects comfort, functionality, and safety. If the band is too loose, the watch can slide around, which may be distracting and affect the accuracy of its sensors.
On the other hand, a band that’s too tight can be uncomfortable and restrict blood circulation. The right fit guarantees your watch stays securely on your wrist, making your overall experience way better.
Here’s why you should consider adding or removing links from your Apple Watch band:
Adjusting for Your Wrist Size
Everyone’s wrist is different, and Apple’s standard bands might not fit everyone perfectly. By adding or removing links, you can adjust the band to fit your wrist just right.
Comfort and Style Matter
A band that fits well not only feels great but also looks great. It sits comfortably on your wrist, improving both the watch’s appearance and your overall style.
Better Wearability
A band that’s too tight or too loose won’t be comfortable. Adjusting it by adding or removing links makes your Apple Watch more comfortable and functional. For the sensors to work properly, they need to be in close contact with your skin. A poor fit can affect their readings.
Conclusion
Removing links from your Apple Watch band is a simple process if you know the steps and have the right tools. With this guide, you can easily adjust the band to fit perfectly on your wrist without leaving home. If you’re unsure about the process, seeking help from a professional can keep your band in perfect condition. A well-fitted band guarantees comfort and adds a stylish touch to your Apple Watch.
Questions People Ask Often
What should I do if the pin is stuck?
If you encounter a stuck pin, do not force it out. Try applying a small amount of oil to lubricate the area or gently tap the pin with the removal tool until it loosens. If the pin still won’t move, it’s best to consult a professional for assistance.
What if the band feels loose after removing links?
Sometimes, removing links can make the band feel too loose or uneven. Adjust the clasp or consider adding a link back if needed. Make sure the watch sits comfortably on your wrist without excessive movement.
How many links should I remove?
It depends on your wrist size. Begin by removing one link from each side and check the fit. Keep adjusting until the band fits just right.
What if I lose a pin while removing links?
Try to work in a neat area to avoid losing small parts. If you do lose a pin, you can usually buy a replacement.

